HOW I FRAMED AND FINISHED “KL THE COWBOY” – an original oil painting on fine linen.
The following process is an important component, when an artist is finished working on a painting before it actually goes into a frame.
Many of my paintings are done on linen canvas that is not stretched first. I mount the linen canvas to a wooden or masonite panel/board with tape around all 4 sides. Pre-stretched canvas limits me to basic sizes and is much harder to find space to store until it sells. There are other advantages as well such as: I can prime the canvas myself, cut the canvas to any size, and then cut the boards or panels to match.
Sometimes I prefer painting directly on the panels themselves. I prepare the surface with an oil based or acrylic primer and paint directly on them when they are finished drying. Depending on the subject I am painting, will determine which one I select. For example: my floral paintings look better on the directly primed panels vs. the canvas panels.
Here is the step by step process using the linen canvas mounted to a panel, including the final framing steps:
STEP1
First, I carefully cut around the 4 sides of the finished painting with a metal ruler and X-acto knife. I am careful to cut the exact dimensions of the panel I am mounting this too.
STEP 2
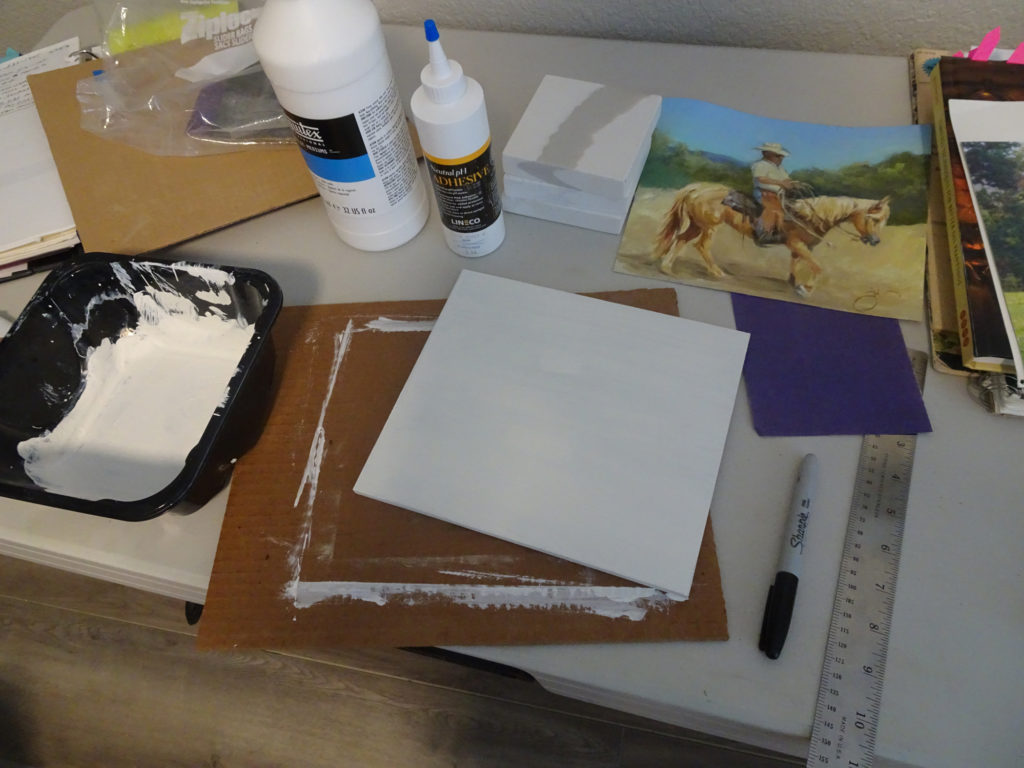
Prep the back of the panel with some white acrylic gesso to seal the final painting surface. This protects from moisture which can cause the panel to fall apart and deteriorate the canvas on which the art is painted. I also seal the sides to protect it as well and let it dry to the touch. This also allows me to sign my name and title of the artwork here in marker.
STEP 3
Flipping over the panel (must be completely dry), I lightly sand the surface with a fine sand paper to create a tooth for the canvas to cling to the panel.
STEP 4
I apply the archival quality adhesive to the canvas and the board it will be mounted to. Careful to get all the air bubbles, I then attach it and smooth it out onto the board. I place a small piece of cardboard over the artwork and then place some weight on it. It will dry very quickly and be ready for the frame!
STEP 5
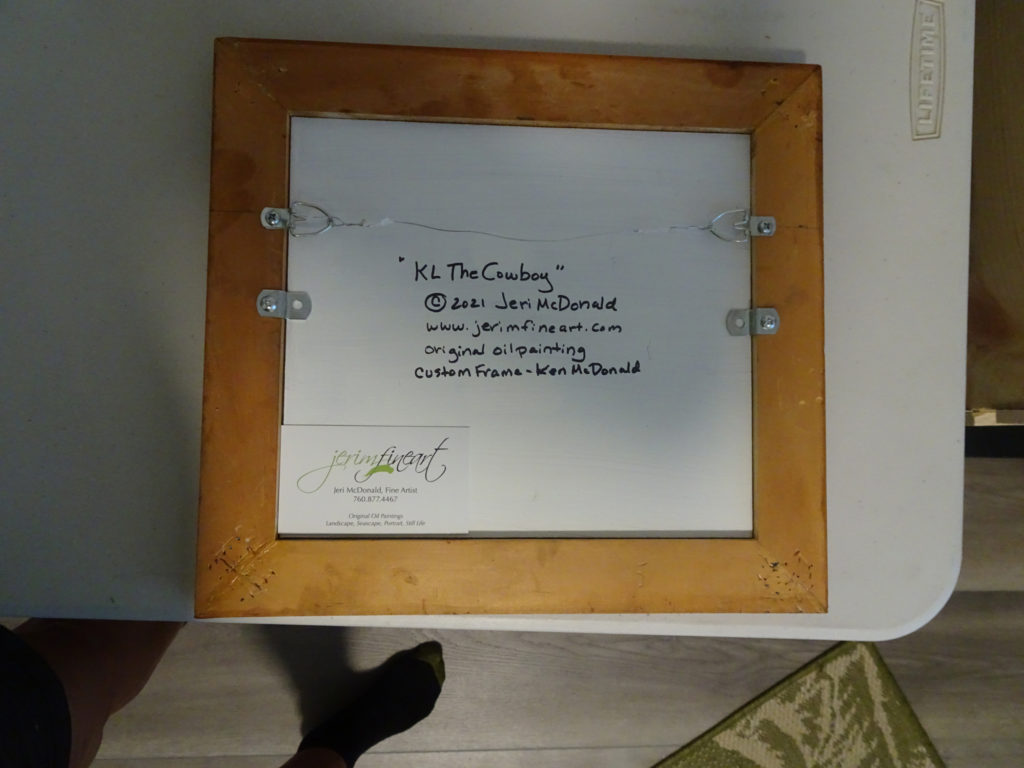
Place the painting into the custom frame my husband built specifically to match this unique work. Always match the frame to the art, not to the decor of where it is to be hung. The frame was treated with tung oil which is harmless to humans and animals and seals the wood. First we added a few dents into the surface with some nails of different sizes to make the frame appear rustic and weathered.
STEP 6
Add hardware to mount the painting inside the frame. Then wire is strung across the back for hanging. We are done and the painting is ready to hang in it’s new home!
So you can see there is much more to creating a work of art than the actual application of paint. I believe many art lovers and collectors enjoy learning a bit more about how artists create what artists create!
Do you know someone who would enjoy reading this? If so, please forward it to them.
Thanks for reading and I sincerely hope to hear your feedback!
Warm wishes to all,
Jeri


